“Can you use Spotify music on LumaFusion?” – Jelly from Quora
LumaFusion is a powerful video editing application designed specifically for iOS devices, such as iPhones and iPads. This program offers a wide range of video editing features, which are loved by many professionals. In addition to the editing capabilities, LumaFusion offers robust audio editing tools. Users can mix multiple audio tracks, apply filters and effects, adjust volume levels, and synchronize audio with video clips.
Spotify is an excellent music source for video editors. After all, it offers a vast library of songs that you can use for your projects. The only problem is that there’s no integration between LumaFusion and Spotify, so you don’t have a direct way to import Spotify music files to the editor. But don’t worry, there’s an alternative way. In this article, we will show you how to download and add Spotify music to LumaFusion in just a few simple steps using the best tool. Let’s take a closer look at it.

- Part 1. Add Music from Spotify to LumaFusion – Best Tool
- Part 2. Download Spotify Music for LumaFusion – Steps
- Part 3. Import Spotify Music to LumaFusion
- Part 4. In Conclusion
Part 1. Best Tool to Add Music from Spotify to LumaFusion
The reason why it’s hard to do that is because the music streaming platform uses a proprietary format that is not compatible with LumaFusion. Besides, its audio content is protected by DRM technology. Fortunately, things get solved with a third-party professional tool.
Here we’ll highly recommend an easy-to-use Spotify music downloader tool – AudFun Spotify Music Converter. It can help you convert Spotify music to a format compatible with LumaFusion, like MP3. In addition, it supports the conversion of Spotify songs to other popular formats such as AAC, FLAC, and WAV.
Moreover, AudFun Spotify Music Converter offers high-quality conversion without Spotify Premium. It can keep the same audio quality as the original Spotify track even after conversion. While at the same time, it runs the downloading at a faster 5X speed with your music ID3 tags preserved. After that, it won’t be troublesome at all to use Spotify music files in LumaFusion or other devices.

Key Features of AudFun Spotify Music Converter
- Provide a conversion speed of up to 5X in batch downloads
- Support 6 output formats: MP3, WAV, FLAC, AAC, M4A, and M4B
- Keep every Spotify song with lossless quality and ID3 tags
- Easy to use with an intuitive interface
Part 2. How to Download Spotify Music for LumaFusion
Now that you know what AudFun Converter is and what it can do, it’s time to learn how to use it to download and add music from Spotify to LumaFusion. The good news is that it’s easy to be used by anyone, regardless of their level of technical expertise. With the usage guide below, you can get started in a few minutes.
Step 1 Setup AudFun Spotify Music Converter
Firstly, you must set up the AudFun Spotify Music Converter that supports Windows or Mac OS on your computer. And ensure the Spotify app is installed as well. Next, log in or register an account for Spotify or the AudFun program.
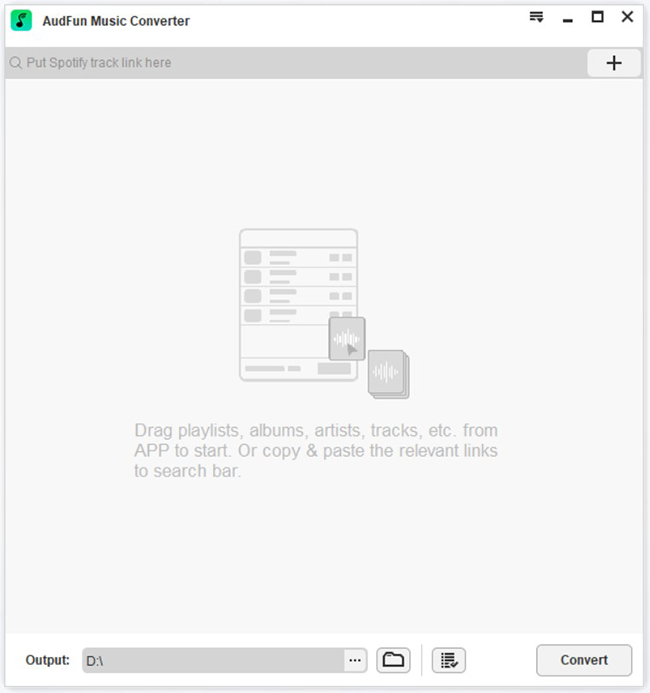
Step 2 Load Spotify playlists to AudFun
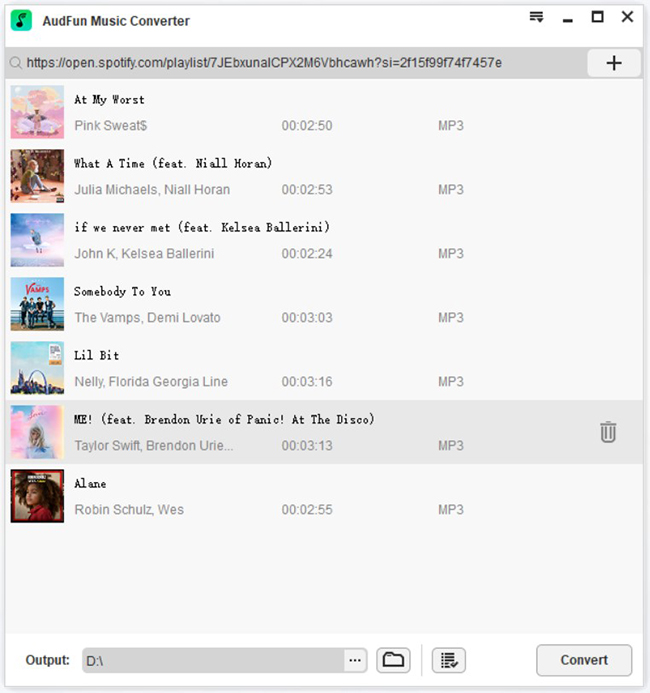
Go to the Spotify desktop application. Discover the Spotify songs you want to stream Spotify on LumaFusion. Select one particular song item and click on the “Share” button to copy the song’s link. Then paste the link to the AudFun address bar and tap on the “+” button to load it onto AudFun. Or you can opt to drag and drop the songs to the AudFun interface to download Spotify music to computer.
Step 3 Reset Spotify audio output format
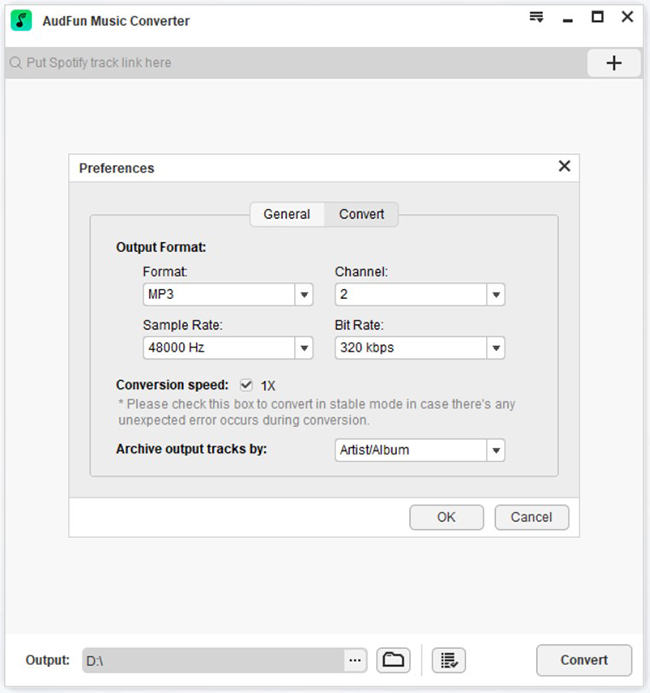
Now go to the Menu bar, select “Preferences“, and then “Convert” in the settings window where you are able to adjust the audio output formats to MP3, FLAC, WAV, AAC, etc., fine-tune the song’s sample rate, and bit rate, and even change the conversion speed. When all settings are to your preference, tap the “OK” button.
Step 4 Download and convert Spotify to MP3
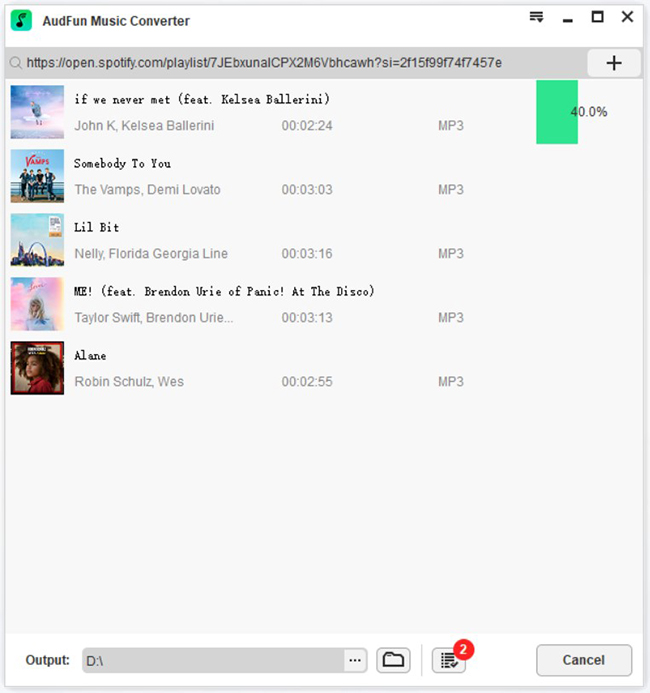
To start the downloading process, click the “Convert” button. All the Spotify songs will be converted to the set music specifications. After the conversion is completed, you can access all the converted music tracks on your local computer by going to the “Converted” button.
Part 3. How to Import Spotify Music to LumaFusion
Since all the audio files are now in MP3 format, it’s time to learn how to add Spotify music to LumaFusion. Before that, you need to move the converted files to your device by a USB cable, and you can then follow the steps below.
1) Launch the LumaFusion on your iOS device.
2) Go on to create a new project and add a video or photo you like.
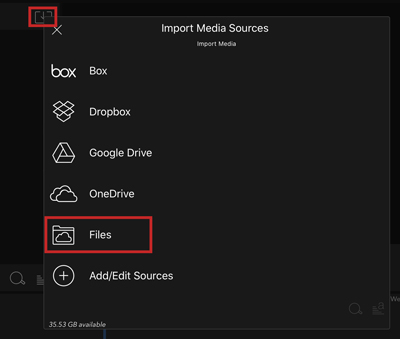
3) Select the “Import Media” option after creating the project.
4) Next, find the song you want and add Spotify music to video project.
Part 4. The Bottom Line
With AudFun Spotify Music Converter, you can easily download and convert Spotify songs to a common format that is supported by the video editing app. After that, you can add the converted songs to your LumaFusion project. Now start creating amazing video projects with background music of your choice from Spotify!