
Spotify Premium subscription gives you up to four options to settle on. You can go for the Individual, Duo, Family, or Student Premium subscription and get numerous benefits of the streaming service. Most users settle for the Individual Premium version that comes with up to a 3-month free trial. You can freely listen to your music anywhere, play songs on any device, enjoy uninterrupted music, and even get unlimited skips.
But some users still end up canceling their subscription on basis of price, catalog inconsistency, among others. This also means that you will no longer get unlimited access to your songs. What then do you do to keep Spotify music forever even after canceling your subscription? Let’s dive in for more insights into the subsequent sub-topics.
- Part 1. Can You Keep Spotify Music Forever after Unsubscribing?
- Part 2. How to Keep Spotify Music Forever – Best Way
- Part 3. How to Keep Music from Spotify Forever – Alternative Way
- Extra Tip: How to Cancel Spotify Subscription
- Conclusion
Part 1. Can You Keep Spotify Music Forever after Unsubscribing?
It is breadth-taking to have a Spotify Premium subscription and get the good perks that are associated with it. Among the many benefits, you will download up to 10,000 songs and listen to them offline. Better enough, the Premium version allows you to access Spotify Connect which connects your music across different devices like media players, computers, and phones.
But imagine you lose all these good perks and many more if you unsubscribe from Spotify music. You, therefore, can’t stream offline and won’t manage to keep your music forever. The only way out to get your Spotify tracks is through the Spotify app or browser. It has restrictions that don’t enable you to play music outside the app. By this, you can’t keep your Spotify hits forever after canceling Spotify Premium subscription.
Part 2. How to Keep Spotify Music Forever – Best Way
Don’t freak just yet! There is a way of how can you keep downloaded music from Spotify forever via the best tool. AudFun Spotify Music Converter makes music playback easier than you can imagine. It will effortlessly download and rip playlists from the Spotify app for offline listening. It has a deep algorithm mechanism that breaks Spotify restriction from its OGG Vorbis format to highly playable formats like FLAC, MP3, WAV, ACC, etc.
The converted files will have no flaws whatsoever. AudFun Converter automatically saves lossless ID3 tags and metadata information that helps you to identify and manage your audio files. These include the artist, album, composer, and many others. When all is done, you can then easily play your tracks on several devices and players as well as keep your music forever even after unsubscribing the Premium version.
Key Features of AudFun Spotify Music Converter
- Download and convert Spotify at 5X speed
- Access your playlists offline on multiple devices and players
- Support various output formats like WAV, FLAC, MP3, etc
- Retain all ID3 tags like genre, artist, album, etc.
How to Keep Spotify Music Forever with AudFun Spotify Music Converter
Follow these steps to manage offline playback with AudFun and to keep your Spotify tracks forever after canceling Spotify Music Premium subscription.
Step 1 Download AudFun to your computer
Just visit AudFun Spotify Music Convert site and download either Windows or Mac version to your computer. Install and then launch the app on your computer. Also, ensure you have installed the Spotify app well in advance.
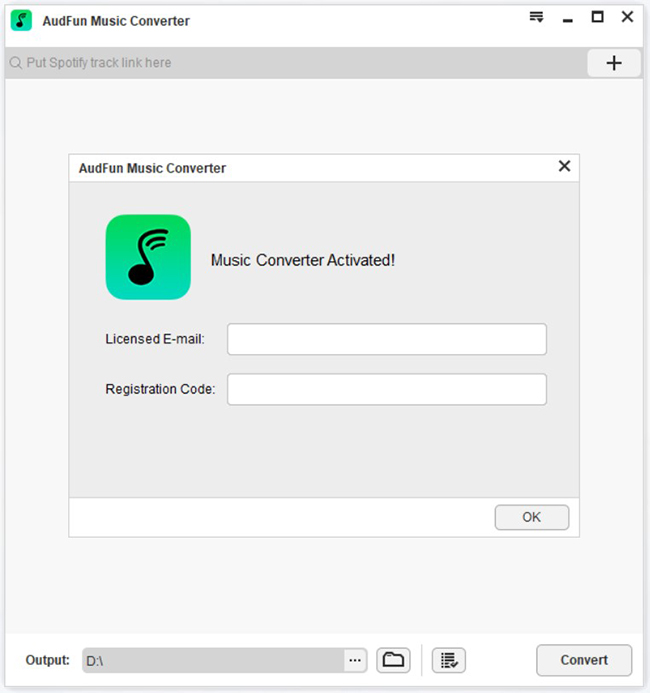
Please note that the trial version will only convert the first 1-minute of your song. You can get more by registering your application. To do so, click on the “Register” tab and enter the information about your licensed email address and code.
Step 2 Add Spotify songs to AudFun for conversion
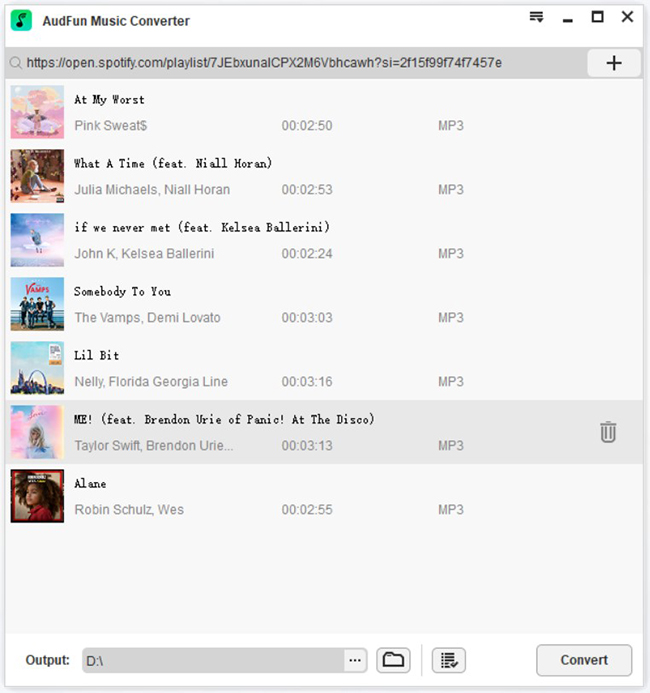
Identify and add the Spotify playlist you wish to convert. Then tap on the item and click the “Share” > “Copy Spotify Link” to copy the URL link. Paste it to AudFun’s interface address bar. Next, click on the “+” icon to load your songs to the application.
Step 3 Customize audio formats and parameters for Spotify songs
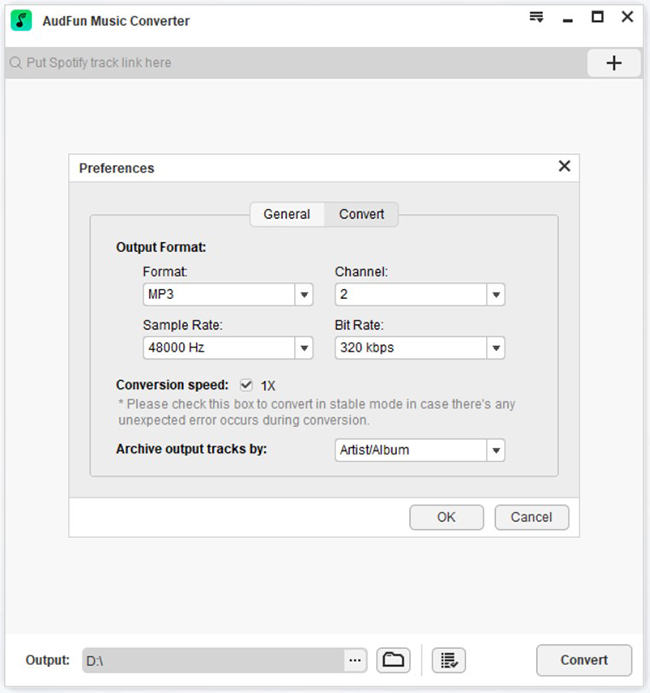
With AudFun converter, you can use any format and parameters of choice. Click on the “Menu” bar and go to the “Preferences” option. Then hit on the “Convert” tab. The Settings window will then open. Next, set the output format to download Spotify songs to MP3 and parameters like the bit rate, sample rate, channel, among others.
Step 4 Convert and download Spotify songs or playlist
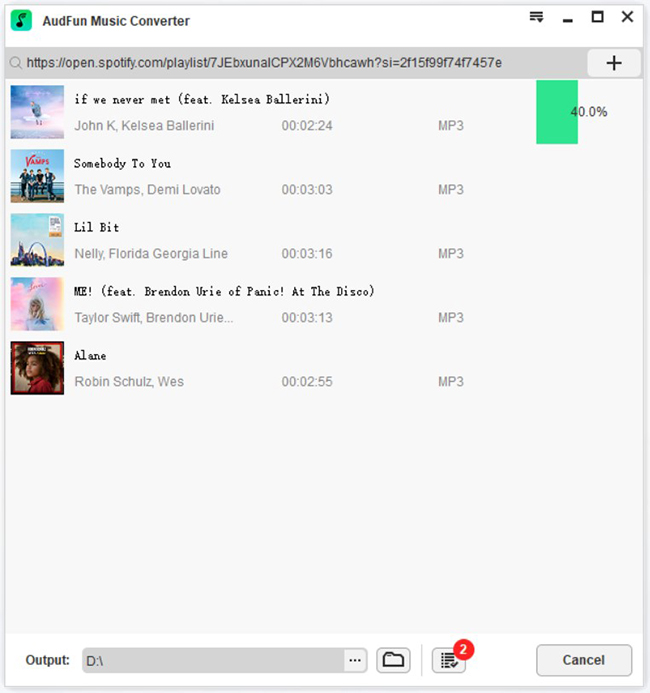
Ensure you have entered the right settings. If so, click on the “OK” button > “Convert” tab. The converter will begin to download and convert Spotify to the playable format you earlier set. Now, locate your playlist on your computer’s destination folder. Then freely transfer them to any device or player for offline playback. Voila! You are just enabled to keep Spotify music forever on your computer.
Part 3. How to Keep Music from Spotify Forever – Alternative Way
Apart from AudFun Spotify Music Converter, you can also use an alternative way to keep Spotify music forever. DRmare Audio Capture can be regarded as a Spotify recorder. It encompasses lossless capturing technology that records your songs at 100% originality. It carefully retains all the metadata information like title, album, cover, artists, and many more.
DRmare Audio Capture also supports multiple audio formats like AAC, M4A, MP3, WAV, etc. These are compatible with iTunes, VLC Player, Windows Media Player, and other portable devices. The speed is fast enough, allowing batch recording of multiple songs simultaneously.
Main Features of DRmare Audio Capture
- Losslessly record your music for offline playback
- Batch record multiple songs accurately
- Retain all ID3 tags and metadata information like album, artists, etc.
- Edit your downloaded tracks by trimming and cutting to the desired standard
Steps to Use DRmare Audio Capture to Get Spotify Music Forever
DRmare Audio Capture comes with impeccable multiple-track recording technology. Apart from recording, you can use it to edit your music for different purposes. Follow these steps to get your music forever after canceling your Spotify Premium subscription.
Step 1 Install and launch DRmare Audio Capture
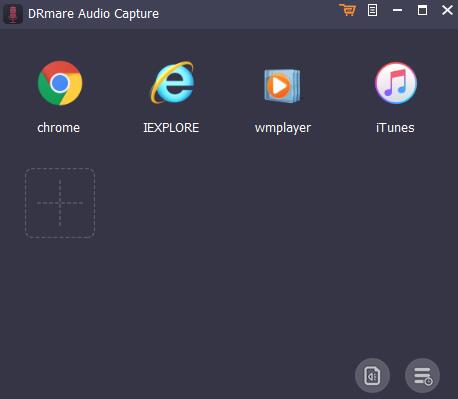
Once you install and launch the app, you’ll be ready to record music from Spotify. Click on the “+” icon to add the Spotify app directly from your computer.
Step 2 Set output parameters for Spotify audio tracks
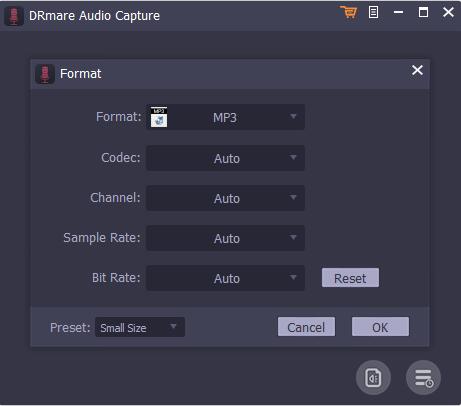
You can choose any output format for your songs. Click on the “Format” icon to choose the output format. Also, set other parameters like codec, sample rate, bit rate, etc.
Step 3 Start to play and record Spotify music

Run the Spotify app to start playing the song you wish to capture. Your song will immediately be detected and recorded.
Step 4 Edit your Spotify songs
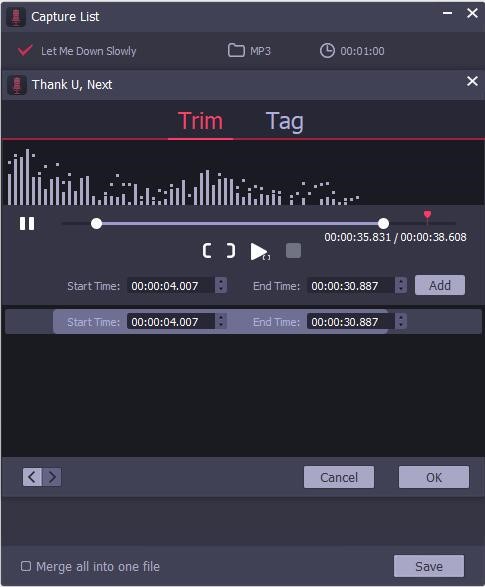
The recording process will automatically end when the playback of the Spotify song ends. You can also edit the song by clicking the “Editing” icon to access the trim, rearrange, cut, among other functions.
Step 5 Save Spotify songs to computer
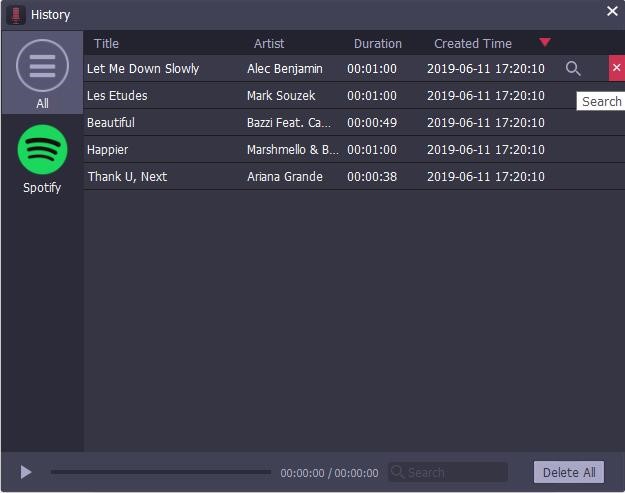
Finally, click the “Save” button to save your recorded songs to the computer and keep your music forever. You can check on the main screen of DRmare Audio Capture to see how many songs are recorded by clicking the “Converted history” icon. Alternatively, just hover the cursor to your computer “Converted songs” folder and click on the “Search” icon to find a specific song.
Extra Tip: How to Cancel Spotify Subscription
In the final part, we will show you how to cancel Spotify subscription. Spotify allows you to cancel your music subscription anytime. To do so, you can follow the steps below.
Step 1. Log into your Spotify.com account page.
Step 2. Then go under your plan and click the “Change plan” option.
Step 3. Scroll down to the “Spotify Free” option. And then hit on the “Cancel Premium” option.
Step 4. Finally, confirm that you want to cancel your subscription and hop out.
Note: Your account page will then show you the date when your plan will revert to “Spotify Free”. You’ll still enjoy the benefits of Spotify Premium until the day it reverts to free.
Conclusion
Many Spotify users who wish to cancel Spotify Premium subscriptions usually ask one question – “Can you keep the downloaded music on Spotify after you cancel Spotify Premium subscription?” This article has enlightened you on the tips on how to keep the music you download on Spotify forever. You can use the best Spotify converter AudFun Spotify Music Converter to download and get your music offline forever.

1 reply on “How to Keep Spotify Music Forever after Canceling Spotify Premium Subscription”
Great write-up.This content has stopped my search on the web which has be unfutile for a while now, thank you.