
Quick Answer
To upload Spotify music to Microsoft OneDrive, you cannot transfer offline cache files directly because Spotify encrypts its streams. A two-step workflow is required:
- Convert streaming tracks locally: Use a dedicated desktop audio converter to save your playlists as standard, DRM-free MP3 or FLAC files with complete ID3 tags intact.
- Upload to cloud storage: Move the converted audio into your local OneDrive sync folder or upload them directly through the web browser.
Once uploaded, your songs stream smoothly across OneDrive on web, mobile apps, and connected devices without subscription restrictions.
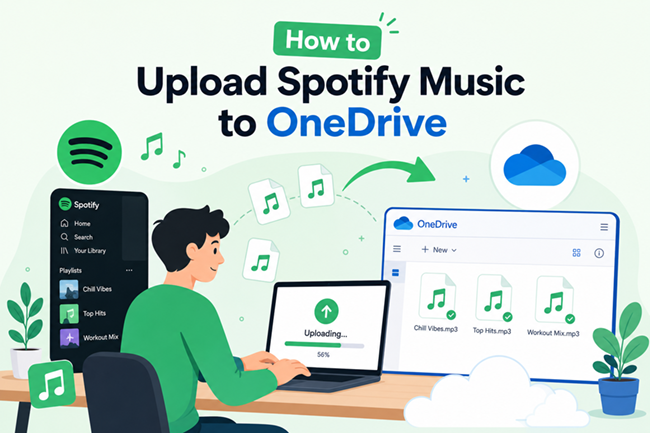
Learning how to upload Spotify music to OneDrive gives you complete ownership and flexible control over your personal audio library. Storing music inside Microsoft’s cloud lets you stream custom playlists to your smartphone, play background tracks on an Xbox console, or embed clean audio into Office presentations without relying on streaming subscriptions.
However, standard transfer attempts fail immediately. Dragging downloaded tracks straight out of the Spotify desktop client yields nothing useful. Renaming encrypted cache files in your local system folders produces unreadable files, and automation services like Zapier or IFTTT can only transfer metadata like track titles rather than real audio.
This guide details the proven two-stage workflow to accomplish this. You will learn how to turn streaming playlists into standard audio files, organize them efficiently inside OneDrive, and configure offline listening across all your devices.
- Part 1. Why Direct Spotify to OneDrive Transfers Fail (and What Actually Works)
- Part 2. How to Convert Spotify Playlists for Cloud Storage with AudFun
- Part 3. Steps to Upload and Manage Converted Spotify Music on Microsoft OneDrive
- Frequently Asked Questions About Uploading Spotify Music to OneDrive
Part 1. Why Direct Spotify to OneDrive Transfers Fail (and What Actually Works)
Dragging Spotify files from a PC or Mac directly into a OneDrive folder will upload the raw data, but you will not be able to play anything. Spotify does not store offline songs as regular standalone audio tracks. Instead, the desktop client fragments incoming audio into small, encrypted cache files hidden away in system directories like %LocalAppData%\Spotify\Storage on Windows or ~/Library/Application Support/Spotify/PersistentCache/Storage on macOS. Microsoft OneDrive includes an integrated web and mobile media player, but it only recognizes standard audio containers like MP3, M4A, and WAV. It cannot parse, decode, or reconstruct Spotify’s proprietary cache data.
Common workarounds shared in online forums do not solve this architectural barrier. Manually appending a .mp3 extension to a raw cache chunk simply creates a malformed file header that crashes media players. Similarly, web automation tools such as Zapier or IFTTT cannot bridge this gap. Those services operate strictly at the API metadata level. They can record song names, artist credits, or web links into an Excel spreadsheet saved on OneDrive, but they possess no mechanism to extract or copy actual audio streams.
Getting your playlists to play properly inside OneDrive requires a structured two-stage approach:
- Local Conversion: Record and decode the streaming tracks into standard audio formats on your local drive, ensuring essential metadata such as track titles, artists, album names, and cover art remain permanently embedded in the ID3 tags.
- Cloud Ingestion: Transfer those standalone audio files into OneDrive using either the native desktop sync client or the web browser interface.
Storage capacity is another critical factor to consider before uploading. A standard free Microsoft account provides 5GB of cloud storage. If you encode your music as 320kbps MP3 files (which consume roughly 8MB to 10MB per song), that 5GB allotment comfortably accommodates between 500 and 600 tracks. Opting for lossless FLAC increases file sizes to 30MB or 40MB per track, which limits that same 5GB capacity to roughly 120 to 150 songs. Aligning your chosen audio format with your available cloud space prevents unexpected storage bottlenecks.
Part 2. How to Convert Spotify Playlists for Cloud Storage with AudFun
Because Spotify protects its offline catalog using encrypted cache chunks rather than open audio containers, transferring local client data directly to Microsoft OneDrive yields unplayable files. Bypassing these restrictions requires converting your tracks into open formats before moving them to the cloud. Preparing standard audio files locally ensures that OneDrive’s media player can read metadata accurately and stream your music smoothly across any connected device.
To complete this conversion step efficiently, you need specialized desktop software capable of recording the audio stream while preserving structural library information. AudFun Spotify Music Converter fulfills this role, transforming selected playlists into standalone audio files ready for cloud ingestion.
AudFun Spotify Music Converter
- Preserves high audio quality output Spotify songs, albums, playlists, etc.
- Supports the conversion of Spotify music files at a high speed of X5 rate
- Listen to Spotify offline without premium on multiple devices and platforms
- Converts Spotify music to several formats like FLAC, M4A, MP3, etc.
Why AudFun Spotify Music Converter for OneDrive
Storing a music collection in the cloud requires balancing acoustic fidelity against storage constraints. AudFun Spotify Music Converter provides dedicated settings tailored for preparing files for cloud storage:
- Efficient Batch Processing: Operating at up to 5x conversion speeds on both Windows and macOS, the tool processes entire playlists and albums in bulk, removing the need for manual single-track handling.
- Complete ID3 Tag Retention: It embeds track titles, contributing artists, album details, track numbers, and cover art directly into the output files. When opened in OneDrive, your collection displays full organizational details rather than unlabeled filenames.
- Flexible Format Profiles: You can switch between universal MP3 and lossless FLAC. On a standard 5GB OneDrive plan, 320kbps MP3 files take around 8MB to 10MB each, giving you space for 500 to 600 tracks. Selecting uncompressed FLAC at 35MB per track provides studio-level fidelity while fitting roughly 140 songs within the same storage boundary.
Step-by-Step Tutorial
Follow these steps to produce clean, playable audio files on your computer before uploading them to OneDrive.
Step 1. Import Spotify Playlists into the Converter
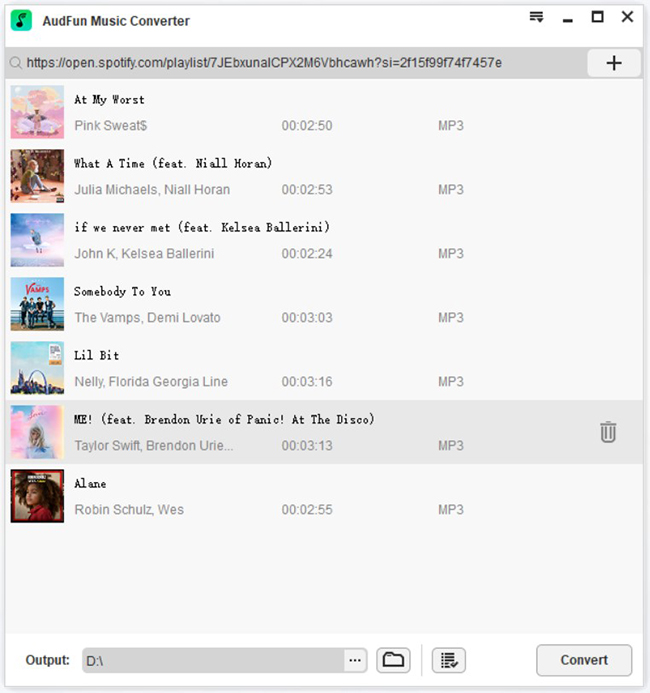
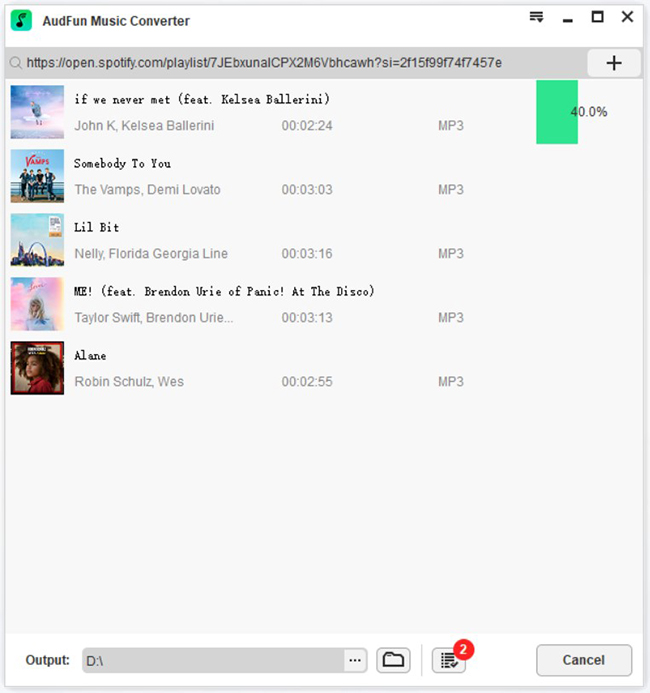
Launch AudFun Spotify Music Converter on your desktop, which automatically prompts the Spotify application to open alongside it. Within Spotify, navigate to the playlist or album you wish to store in OneDrive. Click the three dots next to the title, choose Share > Copy Spotify Link, and paste this URL into the input field at the top of the AudFun interface. Click the + button to analyze and populate the tracklist into the conversion queue.
Step 2. Adjust Audio Parameters for Cloud Storage
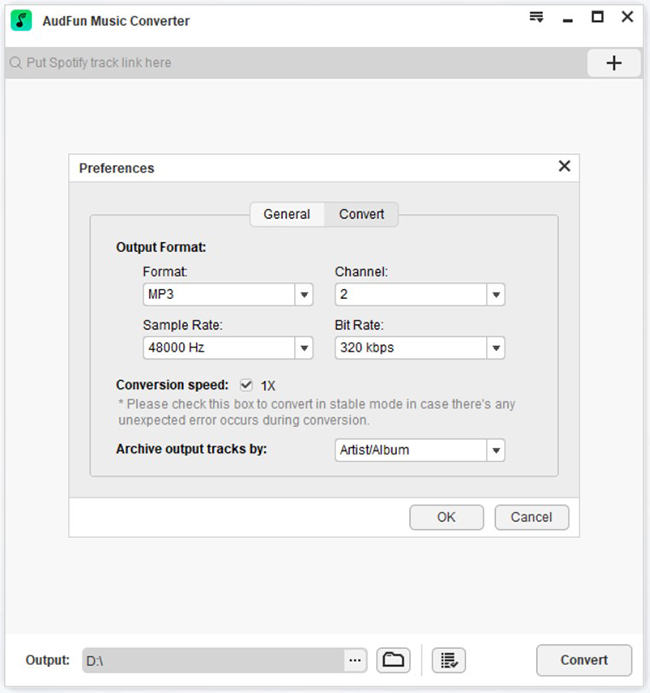
Click the top Menu icon, select Preferences, and switch to the Convert tab. Select MP3 as the output format for optimal compatibility with OneDrive’s built-in web and mobile media players. For high listening quality, configure the bit rate to 320 kbps and the sample rate to 48,000 Hz or 44,100 Hz. You can also choose how output files are sorted into artist and album subfolders to keep your cloud structure organized. Click OK to apply the configuration.
Step 3. Set a Dedicated Local Output Folder
At the bottom of the main window, review the Output destination path. Click the folder icon to specify an easily accessible local directory, such as a desktop folder named Spotify Cloud Staging. Designating a dedicated workspace prevents converted audio from scattering across general download folders.
Step 4. Convert and Check the Extracted Audio
Click the Convert button in the lower-right corner to begin batch processing. AudFun Spotify Music Converter strips DRM restrictions and saves each track as an independent MP3 file containing full ID3 metadata. Once conversion concludes, click the magnifying glass icon under the History tab to access the local folder. Play several tracks in a local player to verify sound clarity and metadata integrity. They are now prepared for cloud upload.
Part 3. Steps to Upload and Manage Converted Spotify Music on Microsoft OneDrive
Sync via OneDrive Desktop Folder
The desktop synchronization client offers the most seamless way to transfer your converted music library into Microsoft’s cloud because it handles file transfers silently in the background without needing a web browser open.
- Open File Explorer on Windows or Finder on macOS and locate your converted music folder.
- Copy or drag the folder directly into your local OneDrive directory (for example,
OneDrive\Music). - Monitor the Status column in your file manager until the blue syncing arrows transition to solid green checkmarks.
- If you wish to retain local offline copies on your hard drive alongside the cloud backup, right-click the folder and choose Always keep on this device.
Upload via OneDrive Web Interface
Using the web browser interface is ideal when operating from shared workstations, office computers, or systems where the desktop sync client is not installed.
- Open your web browser, navigate to onedrive.live.com, and sign in with your Microsoft account.
- Click the Add new button near the upper-left corner and select Folder to establish a dedicated directory, such as “My Music Collection.”
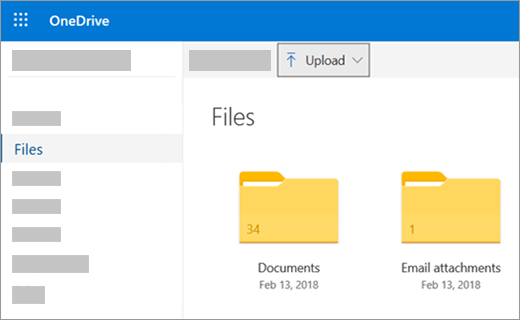
- Open the newly created folder, click Upload, and pick Files or Folder.
- Browse to your local output directory, select the converted tracks, and click Open to initiate the upload. A progress window will track the transfer status.
Enable Mobile Offline Playback on iOS and Android
Storing music in OneDrive lets you stream songs directly through Microsoft’s mobile app, but continuous streaming consumes cellular data. Downloading specific albums directly inside the app ensures reliable playback during flights, commutes, or network outages.
- Launch the OneDrive app on your iPhone or Android phone and ensure you are logged in.
- Tap the Files tab at the bottom and navigate to your music directory.
- Tap the three vertical dots next to a specific song, album, or playlist folder.
- Select Make available offline to initiate the local mobile download.
- Tap your account profile icon and select the Offline files section to access your music anytime without an internet connection.
Optimize Audio Quality Against OneDrive’s 5GB Storage Cap
Because free Microsoft accounts include 5GB of storage shared across documents, photos, and backups, managing your audio library efficiently is essential:
- Stick with 320kbps MP3 for large playlists: Standard 320kbps MP3 files balance high-fidelity sound with manageable file sizes (8MB to 10MB per track), letting you store 500 to 600 songs without exceeding the 5GB boundary.
- Reserve FLAC for select priority tracks: Uncompressed FLAC files average 30MB to 40MB per song. While they deliver bit-perfect audio, they quickly reduce your cloud capacity to around 120 to 150 songs.
- Monitor embedded album art dimensions: Extremely high-resolution artwork embedded inside ID3 tags can add 2MB to 5MB to every individual song. Keeping embedded cover art at 600×600 pixels preserves valuable storage.
- Periodically review storage usage: Navigate to Manage Storage within your OneDrive account settings to monitor available capacity and purge unwanted albums before hitting capacity limits.
Frequently Asked Questions About Uploading Spotify Music to OneDrive
Why can’t I drag and drop songs directly from the Spotify desktop client into OneDrive?
Spotify saves offline downloads as encrypted, fragmented cache streams rather than standard media files. Dragging content out of the client only exports proprietary application data that OneDrive’s player cannot decode or stream.
How to upload Spotify music to OneDrive without an active Premium subscription?
Both Free and Premium users can accomplish this by converting streaming tracks into universal MP3 files first. Software like AudFun Spotify Music Converter extracts the music into open formats that you can upload directly to OneDrive.
Can Zapier or IFTTT automatically transfer full audio tracks from Spotify to OneDrive?
No. Web automation services only transfer metadata, such as song titles, artist names, and playlist URLs, into documents or spreadsheets. They cannot access or move actual binary audio files between cloud platforms.
How many converted Spotify songs can I store within OneDrive’s free 5GB tier?
Using 320kbps MP3 files (roughly 8MB to 10MB per song), OneDrive’s free 5GB tier accommodates approximately 500 to 600 songs. Storing lossless FLAC tracks (30MB to 40MB each) limits capacity to between 120 and 150 songs.
How do I play uploaded Spotify tracks offline using the OneDrive mobile app?
Open the OneDrive mobile app on iOS or Android, browse to your music directory, tap the three dots next to any song or folder, and choose Make available offline to store it locally for internet-free playback.
Conclusion
Uploading Spotify music to OneDrive requires converting encrypted streaming data into standard audio containers before attempting to sync. Utilizing AudFun Spotify Music Converter simplifies this transition by producing clean, unencrypted MP3 files with full ID3 metadata, making them immediately compatible with Microsoft’s cloud ecosystem.
Once uploaded, OneDrive transforms into a personal streaming server across mobile devices, desktop systems, and gaming consoles. Encoding your tracks at 320kbps MP3 preserves crisp audio while maximizing your free 5GB cloud storage allowance. Use the offline toggle within the mobile app to enjoy uninterrupted playback wherever you go.